Why You’ll Love this Gluten Free Scones Recipe
If you’re looking for a delightful treat that won’t compromise your dietary needs, you’ll love this gluten free scones recipe.
These scones aren’t only easy to make, but they also deliver a soft, fluffy texture that rivals traditional scones. I adore how the combination of rice flour and tapioca flour creates a perfect blend, making each bite a true delight.
The sweetness from the sultanas adds a lovely burst of flavor, and they’re just the right amount of sweet. Plus, you can whip them up in no time, making them ideal for brunch or a cozy afternoon snack.
Trust me, once you try these gluten free scones, you’ll want to make them again and again!
Ingredients of Gluten Free Scones
When it comes to making gluten free scones, gathering the right ingredients is the first step toward success. With a mix of flours and a hint of sweetness, these scones aren’t only satisfying but also simple to prepare.
As you explore the ingredient list, you’ll notice that most of them are pantry staples. So, let’s get organized and see what we need to whip up this delightful treat.
Here’s what you’ll need for the gluten free scones:
- 275 g rice flour
- 50 g tapioca flour
- 2 teaspoons baking powder
- 4 teaspoons xanthan gum
- 1 teaspoon salt
- 4 tablespoons caster sugar
- 110 g butter
- 110 g sultanas
- 2 eggs (preferably free-range)
- 125 – 175 ml natural yoghurt
- 1 egg (beaten, for egg wash)
Now, before you start mixing and baking, let’s chat about a few considerations regarding these ingredients.
If you’re wondering about the flours, rice flour is the star here, providing a great base, while tapioca flour helps with texture and chewiness. Xanthan gum is essential for binding—think of it as the glue that holds everything together since gluten is off the table.
And the sultanas? They’re not just there for looks; they add a lovely sweetness that balances out the savory goodness of the scones. Plus, if you’re not a fan of sultanas, feel free to swap them out for chocolate chips or even fresh berries.
After all, baking should be fun, right? So, gather your ingredients, and let’s get ready to make some scrumptious gluten free scones that everyone can enjoy.
How to Make Gluten Free Scones

Ready to plunge into the delightful world of baking? Making gluten free scones is a breeze, and trust me, your friends and family will be impressed.
First things first, preheat your oven to a toasty 250°C (that’s 475°F for our friends across the pond) because nobody wants to wait around for a cold oven to catch up. While that’s heating up, let’s gather our ingredients and get mixing.
Start by sifting together 275 g of rice flour, 50 g of tapioca flour, 2 teaspoons of baking powder, 4 teaspoons of xanthan gum, 1 teaspoon of salt, and 4 tablespoons of caster sugar in a large bowl. Sifting is like giving your dry ingredients a spa day; it helps everything blend together beautifully.
Now, here’s where the fun begins. Grab 110 g of butter, cut it into small pieces, and rub it into the dry mix with your fingers. It should feel like you’re making a sandy beach, not a dough—so don’t worry if it looks a bit crumbly. Once that’s done, toss in 110 g of sultanas, and gently mix them in. Just imagine those little bursts of sweetness waiting to melt in your mouth.
Now, let’s move on to the wet ingredients. In a separate bowl, lightly whisk together 2 eggs and 125 to 175 ml of natural yoghurt—feel free to adjust that yoghurt based on how you like your dough.
Make a well in the center of your dry mix, pour in the egg and yoghurt mixture, and stir until it all comes together into a soft dough. If it’s a little too sticky, don’t panic; just add a splash more yoghurt.
Once you’ve got that dough, turn it out onto a rice-floured surface and knead it lightly. Don’t overdo it; we’re not trying to make bread here. Shape it into a round, roll it out to about 2.5 cm thick, and use a 5.5 cm cutter to cut out rounds.
Place them on a rice-floured baking sheet, give them a little egg wash with that extra beaten egg, and pop them in the oven. Bake them for about 10 minutes until they’re golden brown on top.
Let them cool on a wire rack, and voilà! You’ve got yourself some scrumptious gluten free scones that are just begging to be slathered in butter and jam. Enjoy!
Gluten Free Scones Substitutions & Variations
While sticking to the traditional gluten free scone recipe is delightful, experimenting with substitutions and variations can elevate your baking game.
For a nuttier flavor, I love using almond flour instead of rice flour. If you’re looking for a dairy-free option, coconut oil works wonders in place of butter.
You can also swap sultanas for dried cranberries or chopped dark chocolate for a sweeter twist. Adding a splash of vanilla extract or a hint of citrus zest can really brighten the flavor.
If you prefer a savory scone, try incorporating herbs like rosemary or cheese alternatives.
The possibilities are endless, so don’t hesitate to get creative and find your perfect gluten free scone combination!
What to Serve with Gluten Free Scones
After exploring delightful substitutions and variations for gluten free scones, it’s time to think about what pairs well with them.
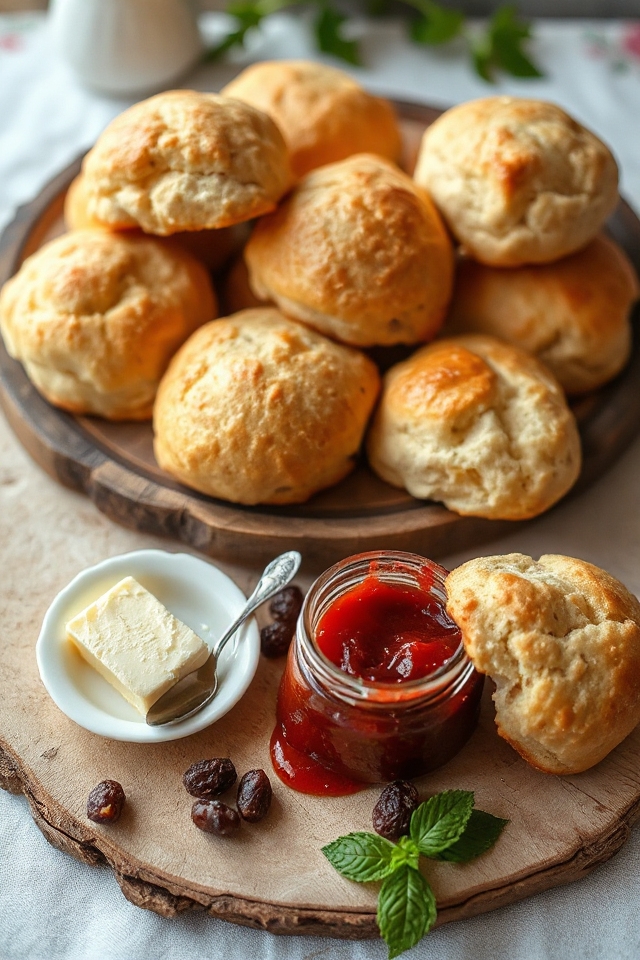
I love serving my scones warm, split in half, and generously slathered with butter. For an extra touch of sweetness, a dollop of jam—like strawberry or raspberry—complements the sultanas beautifully. If you’re feeling indulgent, clotted cream is a luxurious addition that elevates the experience.
I also enjoy a steaming cup of tea or coffee alongside my scones; the warmth and richness enhance the flavors.
Fresh fruit, like berries or slices of apple, can add a revitalizing contrast, making it a delightful treat. Experiment with your favorites, and you’ll find the perfect pairings for your gluten free scones!
Additional Tips & Notes
To guarantee your gluten free scones turn out perfectly, I recommend measuring your ingredients accurately and using a kitchen scale for the best results.
It’s also worth noting that freshness matters; verify your baking powder and xanthan gum aren’t expired. If you prefer a richer flavor, feel free to substitute half the butter with cream cheese.
Remember, the dough should be soft but not sticky, so adjust the yogurt as needed. When cutting out your scones, don’t twist the cutter—it can affect the rise.
For an extra special touch, sprinkle some sugar on top before baking. Finally, store any leftovers in an airtight container to keep them fresh.
Enjoy your baking!