Why You’ll Love this Gluten Free Chocolate Muffins Recipe
If you’re looking for a delicious treat that won’t compromise your dietary needs, you’ll love this gluten-free chocolate muffins recipe.
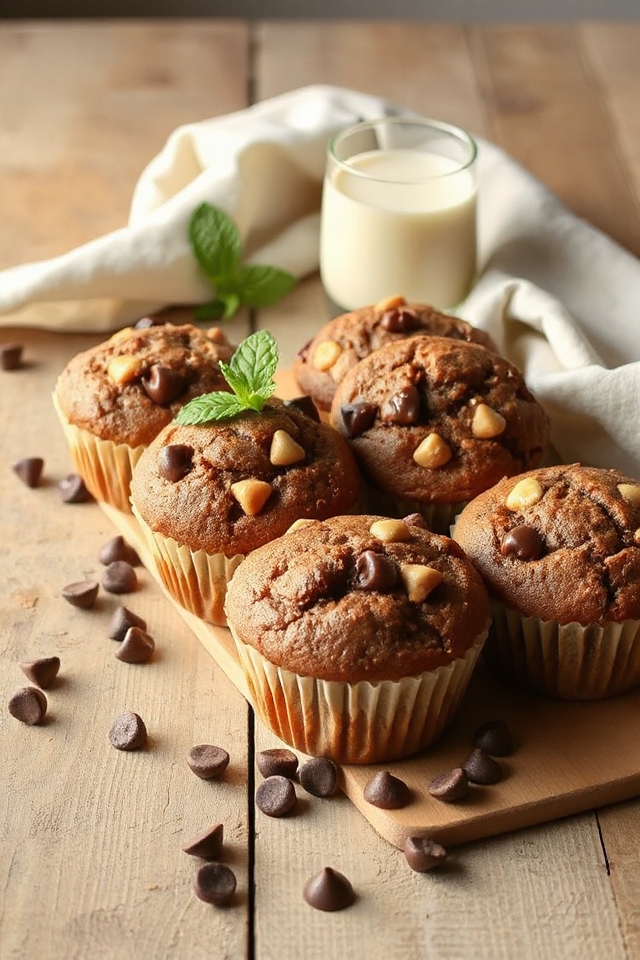
I can’t tell you how satisfying it’s to bite into a moist, chocolatey muffin, knowing I’m indulging without the gluten. These muffins are incredibly easy to whip up, making them perfect for a quick breakfast or a sweet snack.
Plus, the rich chocolate flavor combined with a hint of butterscotch creates a delightful taste sensation. I’ve shared these muffins with friends who don’t even follow a gluten-free diet, and they always rave about how good they are!
Trust me, once you try them, you’ll be hooked on these gluten-free delights. Enjoy every bite guilt-free!
Ingredients of Gluten Free Chocolate Muffins
When it comes to whipping up a batch of gluten-free chocolate muffins, the ingredients are your best friends, and I’m here to walk you through them! You’ll find that these ingredients not only cater to your gluten-free needs, but they also come together to create a rich, chocolatey treat that’s downright irresistible.
So, let’s plunge into what you’ll need for this scrumptious recipe.
Here’s your ingredient list for making Gluten Free Chocolate Muffins:
- 1/2 cup rice flour
- 1/4 cup potato starch
- 1/4 cup tapioca flour
- 1 cup brown sugar
- 1/2 cup oatmeal
- 1/2 cup butter
- 1 egg
- 1 teaspoon salt
- 1 teaspoon baking soda
- 1 teaspoon xanthan gum
- 6 ounces chocolate chips
- 6 ounces butterscotch chips
Now, let’s talk a bit about these ingredients. First off, don’t let the fancy names like “xanthan gum” scare you. It’s a key player in gluten-free baking because it helps mimic that lovely elasticity gluten provides in traditional recipes.
And how about those chocolate and butterscotch chips? They’re not just for decoration; they melt into gooey pockets of goodness that elevate each bite.
Feel free to mix it up too. Want to throw in some nuts or dried fruit? Go for it. Just remember, it’s your kitchen, and your rules apply.
How to Make Gluten Free Chocolate Muffins

Alright, let’s get those ovens preheated and plunge into the delightful process of making those Gluten Free Chocolate Muffins! First, you’ll want to cream together 1/2 cup of butter and 1 cup of brown sugar in a mixing bowl. Honestly, there’s something so satisfying about watching those two ingredients come together until they’re light and fluffy. It’s like magic, but without the need for a wand.
Once your mixture is looking good, toss in 1 egg and mix it until everything is fully combined. You’re building your muffin base here, so make sure it’s nice and smooth, like a good cup of hot cocoa on a chilly day.
Now, let’s move on to the dry ingredients. In a separate bowl, combine your 1/2 cup of rice flour, 1/4 cup of potato starch, and 1/4 cup of tapioca flour. Don’t forget to add in 1 teaspoon of baking soda, 1 teaspoon of xanthan gum, and 1 teaspoon of salt. These ingredients are essential for giving your muffins that perfect rise and texture.
Mix them together until they’re well blended—think of it as giving them a little spa treatment before they join the wet ingredients. Once they’re all mixed, gradually add the dry mixture to the butter-sugar-egg concoction. Stir gently, but don’t overdo it; we’re not in a wrestling match here. Just blend until you don’t see any more floury bits.
Finally, it’s time to bring in the stars of the show: those 6 ounces of chocolate chips and 6 ounces of butterscotch chips. Fold them in delicately, almost like you’re tucking them in for a cozy nap in the muffin batter.
Now, drop generous teaspoonfuls of this luscious mixture onto a greased cookie sheet. Bake them at 350°F for about 8 minutes, but keep an eye on them; ovens can be temperamental little beasts. When they’re done, they should look like little puffs of chocolatey joy.
Let them cool for a minute, then dig in. You’ll be the proud creator of a gluten-free treat that’s as tasty as it’s easy to make. Enjoy every bite—you’ve earned it!
Gluten Free Chocolate Muffins Substitutions & Variations
While I love the classic recipe for gluten-free chocolate muffins, there’s always room to get creative with substitutions and variations.
For a healthier twist, I often swap out half the butter for unsweetened applesauce or Greek yogurt. If you’re looking for a nutty flavor, try adding almond flour instead of some rice flour.
You can also mix in different types of chocolate, like dark or white chocolate chips, or even dried fruits like cranberries for a fruity kick.
Need it dairy-free? Substitute coconut oil for butter and use dairy-free chocolate chips.
If you want a little spice, adding a teaspoon of cinnamon or a splash of vanilla extract can elevate the flavor.
The possibilities are endless!
What to Serve with Gluten Free Chocolate Muffins
Pairing gluten-free chocolate muffins with the right accompaniments can truly elevate your experience.
I love enjoying these decadent muffins alongside a dollop of whipped cream or a scoop of vanilla ice cream. The creaminess complements the rich chocolate perfectly.
If you’re in the mood for something fruitier, fresh berries like strawberries or raspberries add a delightful tartness that balances the sweetness of the muffins. A drizzle of caramel or chocolate sauce can also take them to the next level.
For a warm beverage, I recommend a rich hot chocolate or a smooth cup of coffee; both enhance the chocolate flavor beautifully.
Whatever you choose, these pairings will make your indulgent muffins even more enjoyable!
Additional Tips & Notes
When baking gluten-free chocolate muffins, I find it helpful to keep a few tips in mind to guarantee the best results.
First, make sure your ingredients are fresh and gluten-free certified. I also recommend measuring your flours accurately; a kitchen scale can be a game changer.
If you want extra moisture, consider adding a mashed banana or applesauce. For a richer flavor, try using dark chocolate chips.
Don’t skip the xanthan gum; it helps bind the ingredients together.
Finally, let the muffins cool in the pan for a few minutes before transferring them to a wire rack.
Trust me, these simple steps can elevate your muffins from good to absolutely indulgent! Enjoy your baking adventure!