Why You’ll Love this Gluten-Free Vanilla Wafers Recipe
If you’re looking for a delightful treat that caters to gluten-free diets without sacrificing flavor, you’ll love this Gluten-Free Vanilla Wafers recipe.
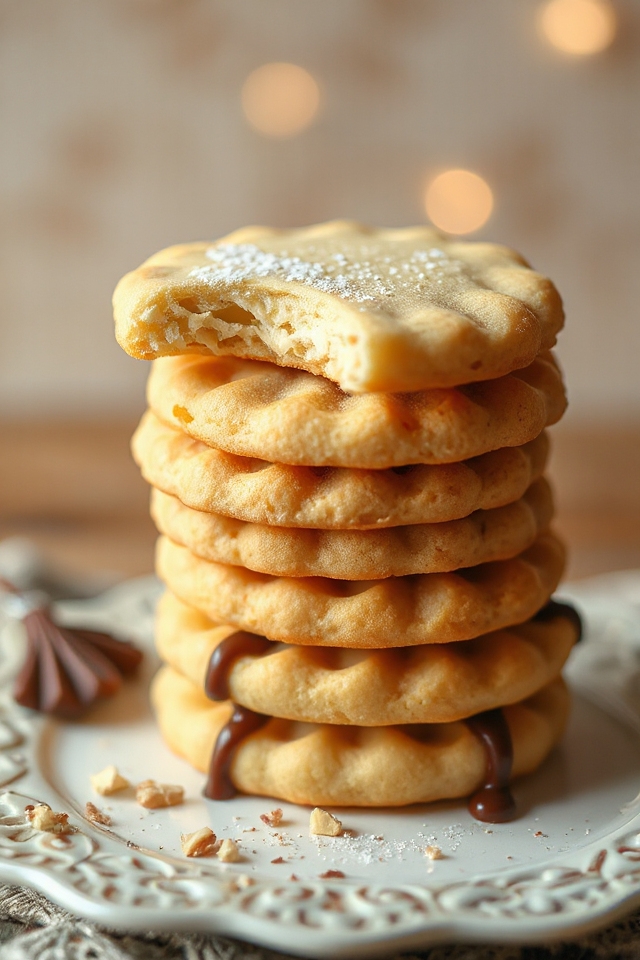
These wafers aren’t just gluten-free; they’re a perfect blend of sweetness and crunch that’ll satisfy your cravings. I can’t tell you how many times I’ve shared these with friends, and their reactions are priceless—they can’t believe they’re gluten-free!
The simplicity of the recipe lets the buttery vanilla flavor shine through, making every bite a joy. Plus, they’re versatile; whether you enjoy them on their own or as a topping for desserts, they fit right in.
Trust me, once you try them, you’ll be hooked and enthusiastic to share the love!
Ingredients of Gluten-Free Vanilla Wafers
Making Gluten-Free Vanilla Wafers is a delightful adventure in the kitchen, and it all starts with gathering the right ingredients. Trust me, you don’t want to miss out on these tasty treats, so let’s make sure you have everything you need.
Imagine the buttery aroma wafting through your home as you whip up a batch of these crunchy cookies; it’s enough to make anyone smile. Plus, they’re super easy to make! So, let’s plunge into what you’ll need to create these irresistible wafers.
Ingredients for Gluten-Free Vanilla Wafers:
- 1/2 cup butter, softened
- 3/4 cup sugar
- 1 egg
- 2 tablespoons light corn syrup
- 1 teaspoon vanilla extract
- 2 teaspoons baking soda
- 1 tablespoon hot water
- 1 1/2 cups sweet rice flour
- 3/4 cup tapioca starch
- Melted chocolate (for decorating, if desired)
Now, let’s chat about these ingredients for a moment. First off, the butter: make sure it’s softened, or you’ll be wrestling with a block of cold butter like it’s a stubborn opponent in a match.
And sugar? Well, it’s the magic ingredient that adds sweetness, but feel free to adjust it if you’re watching your intake. The sweet rice flour and tapioca starch are key players in keeping these cookies gluten-free and giving them that delightful crunch.
One more thing—don’t skimp on the vanilla extract. It’s what adds that lovely, aromatic flavor that makes these wafers absolutely divine. So, grab your apron, and let’s get baking!
How to Make Gluten-Free Vanilla Wafers
To make your Gluten-Free Vanilla Wafers, you’ll first want to grab your mixing bowl and cream together 1/2 cup of softened butter and 3/4 cup of sugar. This step is like giving your cookies a cozy little hug, blending the rich butteriness with sweet sugar until it’s light and fluffy.
Once that’s looking good, crack in 1 egg and add 2 tablespoons of light corn syrup along with 1 teaspoon of vanilla extract. You can already imagine how great your kitchen smells, right? Now, give it all a good mix until everything is well combined.
Next up, it’s time to add a little science to the mix. Dissolve 2 teaspoons of baking soda in 1 tablespoon of hot water, and then add that bubbly goodness to your butter mixture. It’s like a mini science experiment right in your kitchen.
After that, gradually mix in 1 1/2 cups of sweet rice flour and 3/4 cup of tapioca starch. You might find the dough a bit sticky at first, but don’t worry. Knead it gently until it forms a cohesive dough.
Now, shape the dough into two rolls. Yes, I said rolls, not balls—let’s keep it classy. Wrap those rolls in plastic wrap and chill them in the fridge overnight, or if you’re impatient like me, at least for a few hours.
When you’re ready to bake, preheat your oven to 400°F. Slice the chilled dough thinly into wafers and place them on a parchment-lined baking sheet. They don’t need much space between them; they’re not social distancing, after all.
Bake those beauties for about 5-6 minutes until they’re lightly golden. Just a hint of color will do; we’re not trying to make them look like they’ve been sunbathing on a beach.
Once out of the oven, let them cool slightly before decorating with melted chocolate if you’re feeling fancy. And there you have it—your homemade gluten-free vanilla wafers are ready to enjoy!
Gluten-Free Vanilla Wafers Substitutions & Variations
While you might love the classic flavor of gluten-free vanilla wafers, experimenting with substitutions and variations can elevate your baking game.
For a dairy-free option, try using coconut oil or vegan butter instead of regular butter. If you’re looking for a refined sugar alternative, coconut sugar or maple syrup can add a unique flavor twist.
You can also swap out the sweet rice flour for almond flour for a nuttier taste. Feeling adventurous? Add spices like cinnamon or nutmeg to the dough for a warm kick.
For a chocolatey twist, incorporate cocoa powder or dip the wafers in melted chocolate after baking. Don’t hesitate to get creative; the possibilities are endless!
What to Serve with Gluten-Free Vanilla Wafers
After exploring various substitutions and variations for gluten-free vanilla wafers, it’s time to think about how to enjoy them.
I love serving these delightful cookies alongside a scoop of vanilla ice cream or fresh fruit, like strawberries or blueberries. They also pair beautifully with a rich chocolate dip, adding a decadent touch.
If I’m feeling fancy, I might layer them in a dessert parfait with whipped cream and fruit for a fun twist. For tea time, a simple cup of herbal tea complements the sweetness perfectly.
Don’t forget, they’re fantastic for snacking on their own too! With so many options, you can easily find a way to savor these gluten-free vanilla wafers in your favorite style.
Additional Tips & Notes
When I bake gluten-free vanilla wafers, I always keep a few tips in mind to guarantee they turn out perfectly. First, make sure your butter is softened but not melted; this helps create the right texture.
I also recommend chilling the dough overnight—this allows the flavors to meld and makes it easier to slice. When cutting the wafers, aim for thin, even slices for consistent baking.
Keep an eye on them while they’re in the oven; they can go from perfect to overbaked quickly. Finally, if you want a little extra flavor, consider adding a pinch of salt to the dough.
These tips have helped me create delicious, crunchy wafers every time! Enjoy your baking!