Why You’ll Love this Gluten-Free Peanut Butter Granola Bars Recipe
When you take a bite of these gluten-free peanut butter granola bars, you’ll instantly understand why they’re a favorite in my kitchen.
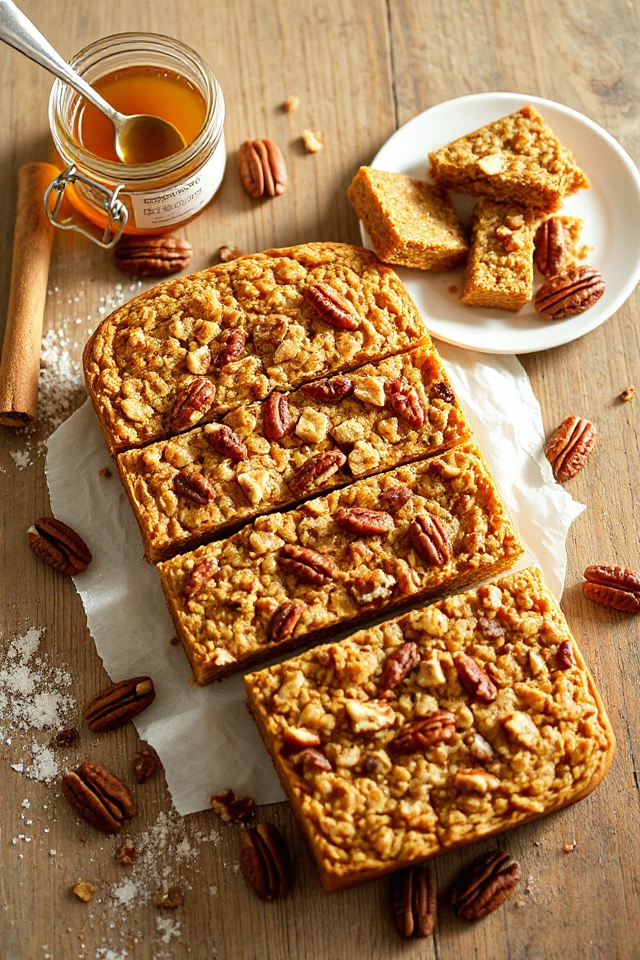
They’re packed with flavor and the perfect balance of sweetness and nuttiness. I love how they’re not just delicious but also incredibly easy to make. With just a few simple steps, you can whip up a batch that’s perfect for breakfast or an afternoon snack.
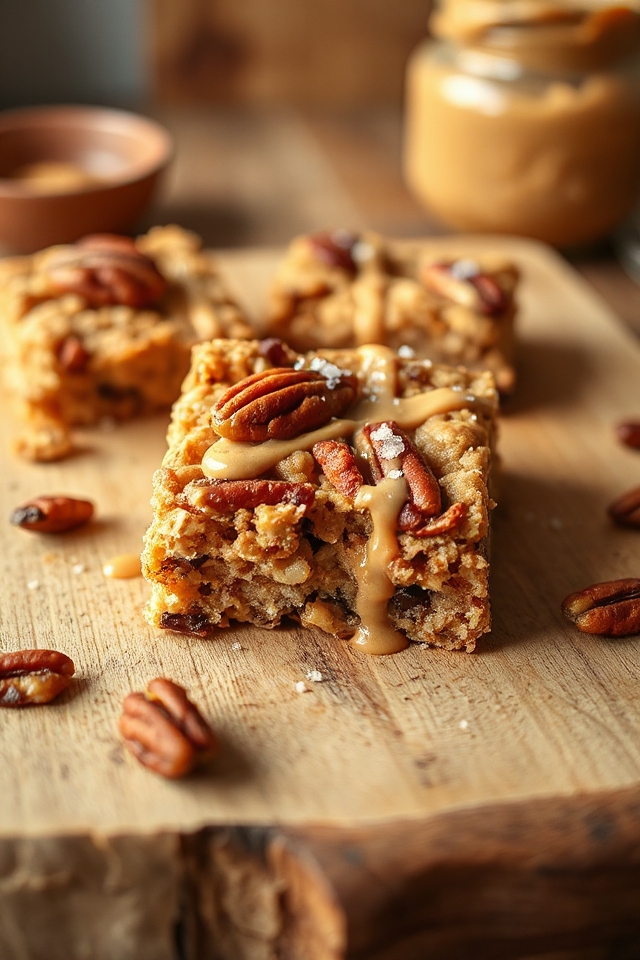
Plus, they’re a fantastic way to use up ripe persimmons, giving them a unique twist. The chewy texture and delightful crunch from the toasted pecans make each bite satisfying.
Trust me, once you try them, you’ll want to keep these granola bars on hand for every craving.
Ingredients of Gluten-Free Peanut Butter Granola Bars
When it comes to whipping up a batch of gluten-free peanut butter granola bars, the ingredients are key. Not only do they create that delicious flavor we all crave, but they also play a crucial role in giving these bars their wonderful texture. You’ll be surprised at how simple it’s to gather everything you need.
So, let’s take a closer look at what goes into these delightful treats, shall we?
Here’s what you’ll need:
- 2 cups hachiya persimmon pulp
- 4 eggs
- 1/2 cup sugar
- 1 1/2 cups gluten-free flour mix
- 2 tablespoons coconut flour
- 1/2 cup butter, melted
- 3/4 cup buttermilk
- 1 cup chopped pecans, toasted
- 1 teaspoon vanilla
- 1 teaspoon baking powder
- 1 teaspoon baking soda
- 1/2 teaspoon salt
- 1 teaspoon cardamom
- 1 tablespoon pumpkin pie spice
- 1 teaspoon ginger
Now, before you start mixing everything together, a couple of things to keep in mind. First, if you can’t find hachiya persimmons, you can always try using another fruit pulp, like applesauce or mashed bananas, but just know it’ll change the flavor a bit.
And don’t skip the toasting of those pecans; it’s a game changer. Toasted nuts bring out a deeper, richer flavor that makes the bars taste gourmet, even if you’re just in your cozy kitchen wearing your favorite pajamas.
Oh, and if you’re not a fan of cardamom or pumpkin pie spice, feel free to swap them out for your preferred spices. Cooking should be fun, right? So, let’s get ready to make something delicious.
How to Make Gluten-Free Peanut Butter Granola Bars
Making gluten-free peanut butter granola bars is as straightforward as it’s rewarding, especially when you sink your teeth into that delicious, chewy goodness.
First off, let’s gather everything we need. You’ll want to preheat your oven to 400°F. This is essential because no one wants to be waiting for the oven to heat up once you’ve got that delightful mix ready. Then, grease an 8-inch round cake pan. I’ve learned the hard way that a well-greased pan can save you from a sticky situation—literally.
Now, grab a large bowl and start mixing your 2 cups of hachiya persimmon pulp, 4 eggs, 1/2 cup of sugar, 1/2 cup of melted butter, 3/4 cup of buttermilk, and 1 teaspoon of vanilla. This is where the magic begins. As you stir these ingredients together, you’ll notice a beautiful blend of flavors and textures forming.
In another bowl, combine 1 1/2 cups of gluten-free flour mix, 2 tablespoons of coconut flour, 1 teaspoon of baking powder, 1 teaspoon of baking soda, 1/2 teaspoon of salt, 1 teaspoon of cardamom, 1 tablespoon of pumpkin pie spice, and 1 teaspoon of ginger. I know, it sounds like a lot of spices, but trust me, they’re what elevate these bars from good to “where have you been all my life?”
Once you’ve got your dry ingredients mixed, it’s time to gently fold them into the wet mixture. Don’t go all Hulk on it; be gentle so you don’t end up with a flour cloud explosion.
Once everything is nicely combined, toss in your 1 cup of toasted pecans. Oh, the aroma of those nuts—just thinking about it makes my mouth water. After you’ve stirred everything together, pour the mixture into your prepared pan and slide it into the oven.
Bake for about 50 minutes. Now, this is the tricky part: the center will still be moist and soft (it may even look undercooked), but don’t panic. The outer layer should be all beautifully browned.
When the timer goes off, let it cool in the pan for at least 20 minutes before you start slicing. Trust me, patience is key here. Enjoy your creation warm, and revel in the fact that you just made a gluten-free treat that’s as delicious as it’s nutritious.
Gluten-Free Peanut Butter Granola Bars Substitutions & Variations
After whipping up those delicious gluten-free peanut butter granola bars, it’s only natural to think about how to customize them to fit your taste or dietary needs.
If you’re not a fan of pecans, try swapping in walnuts or almonds for a different crunch. For a sweeter touch, consider adding chocolate chips or dried fruit like cranberries or raisins.
Want extra fiber? Toss in some chia seeds or flaxseeds. If you prefer a nut-free option, sunflower seed butter works great!
I’ve even played with spices—cinnamon or nutmeg can add a warm flavor twist. Don’t hesitate to experiment; that’s part of the fun in creating your perfect granola bar!
What to Serve with Gluten-Free Peanut Butter Granola Bars
Pairing gluten-free peanut butter granola bars with the right accompaniments can elevate your snack experience.
I love to enjoy my bars with a dollop of Greek yogurt, which adds creaminess and a protein boost. Fresh fruit, like sliced bananas or berries, complements the nutty flavor beautifully and adds a revitalizing touch.
For a bit of indulgence, I sometimes drizzle honey or maple syrup over the top—it’s a sweet contrast that’s hard to resist.
If I’m in the mood for crunch, a handful of mixed nuts or seeds on the side works wonders.
These pairings not only enhance the flavors but also turn a simple snack into something special that keeps me satisfied.
Additional Tips & Notes
When enjoying gluten-free peanut butter granola bars, it’s helpful to keep a few tips in mind to enhance your experience.
First, make sure to use ripe hachiya persimmons for ideal sweetness and moisture. If you prefer a crunchier texture, consider adding more toasted pecans or even some seeds.
I also recommend letting the bars cool completely before slicing; this helps them hold their shape better. For extra flavor, try sprinkling a bit of sea salt on top before baking.
Finally, store any leftovers in an airtight container to maintain freshness. These bars can also be frozen, making them a perfect grab-and-go snack for busy days.
Enjoy experimenting with your variations!