Why You’ll Love this Gluten Free Challah Bread Recipe
If you’ve been missing the rich, sweet taste of traditional challah, this gluten free recipe will bring joy back to your table.
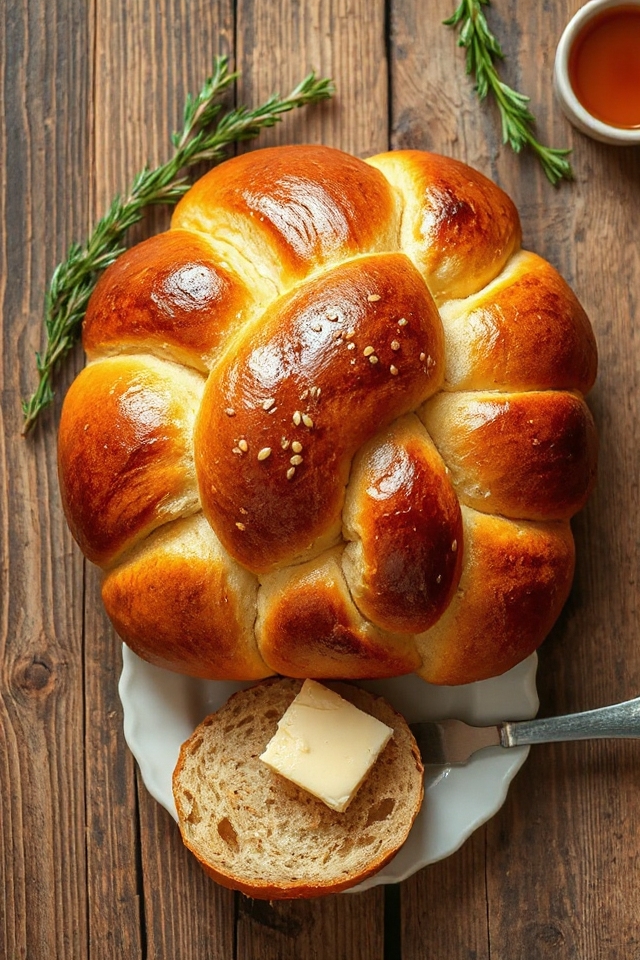
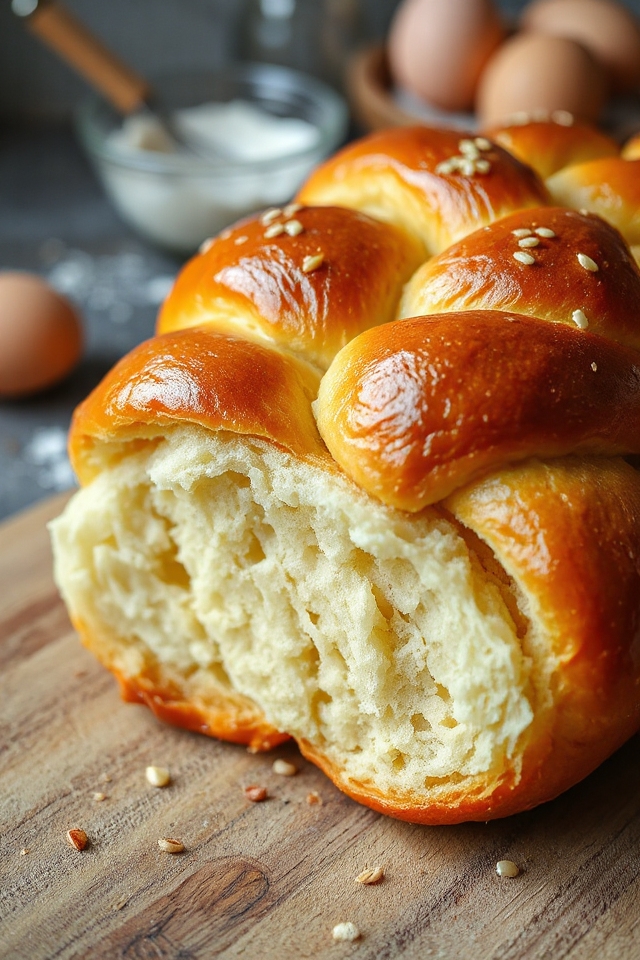
I truly love how this bread captures the essence of the beloved classic while being suitable for those with gluten sensitivities. The texture is surprisingly soft and airy, making it perfect for sandwiches or simply slathered with butter.
Plus, the delightful aroma that fills my kitchen while it bakes is simply irresistible. I also appreciate that it’s easy to make, requiring just a few simple steps.
Whether it’s for a festive gathering or a cozy family dinner, this gluten free challah has become my go-to recipe, proving that you can enjoy delicious bread without sacrificing flavor or tradition.
Ingredients of Gluten Free Challah Bread
Making gluten-free challah bread is a delightful adventure, and it all starts with gathering the right ingredients. Trust me, you don’t want to skip this part. Each ingredient plays a role in creating that soft, fluffy texture and the sweet flavor that makes challah so special.
Plus, when you see all the ingredients laid out, it’s like a little reminder that you’re about to create something amazing. So, let’s take a look at what you’ll need for this gluten-free goodness.
Ingredients for Gluten Free Challah Bread:
- 2 cups rice flour
- 1 3/4 cups tapioca flour
- 1/4 cup sugar
- 2 teaspoons sugar (for the yeast)
- 3 teaspoons xanthan gum
- 1/2 teaspoon salt
- 2/3 cup lukewarm water (for the yeast)
- 1 cup lukewarm water (for the dough)
- 1 1/2 tablespoons yeast
- 4 tablespoons melted butter
- 1 teaspoon apple cider vinegar
- 4 eggs
- Sesame seeds (for topping)
Now, let’s chat a bit about these ingredients. It’s vital to use xanthan gum, especially in gluten-free baking, because it helps give the dough that chewy texture we all love.
And don’t forget about the rice flour and tapioca flour; they’re like the dynamic duo of gluten-free flour! If you’re feeling adventurous, you can experiment with different flours, but I recommend sticking to this blend for the best results. You want that perfect challah texture, right?
Also, the eggs are essential—they not only add richness but also help bind everything together.
Oh, and when it comes to the yeast, make sure your water is lukewarm. Too hot, and you’ll kill the yeast; too cold, and it won’t activate. It’s a delicate balance, much like trying to balance a loaf of bread on your head while dancing around the kitchen—trust me, I’ve tried.
How to Make Gluten Free Challah Bread
Making gluten-free challah bread is a wonderful journey, and I promise you, it’s worth every moment spent in the kitchen. First, let’s get that mixer revved up. Start by combining 2 cups of rice flour, 1 3/4 cups of tapioca flour, 1/4 cup of sugar, 3 teaspoons of xanthan gum, and 1/2 teaspoon of salt in your mixing bowl. This is where the magic begins, folks. These ingredients come together to create the base of your dough.
Now, while that’s mixing away, you’ll need to activate the yeast. In a small bowl, dissolve 2 teaspoons of sugar in 2/3 cup of lukewarm water, then sprinkle in 1 1/2 tablespoons of yeast. Let it sit for about five minutes until it’s all frothy and bubbly—kind of like a science experiment, but with tastier results.
Next, in a separate bowl, mix 4 tablespoons of melted butter with 1 cup of lukewarm water and 1 teaspoon of apple cider vinegar. This mixture is like the secret potion that will give your bread that rich, buttery flavor. Once your dry ingredients are well mixed, gradually pour in the butter and water mixture while the mixer is on low speed. Then, crack in those 4 eggs, one at a time, and let it all blend until the dough feels warm and inviting.
Now, pour in that bubbly yeast mixture and crank the mixer up to high for about two minutes. Yes, I know it feels like you’re just playing with dough, but trust me, it’s all part of the plan.
After your dough is mixed, it’s time for the fun part—letting it rise. Place the bowl in a warm spot, cover it with greased plastic wrap and a towel, and let it rise for about an hour. This is where the dough gets to stretch out and relax a bit, much like I do on a Sunday morning.
Once it’s done rising, give it another quick mix on high for three minutes. Now, here comes the fun part: spoon the dough into a greased and floured loaf pan, filling it about 2/3 full. If you have extra dough, you can make rolls or muffins—because who doesn’t love a good roll? Sprinkle some sesame seeds on top for that classic challah look.
Let it rise again until it’s puffed up over the edge of the pan, which usually takes about 45 to 60 minutes. Finally, preheat your oven to 400°F and bake that beauty for about an hour. If you opted for rolls, they only need about 25 minutes. You’re just a bit of patience away from gluten-free challah heaven.
Gluten Free Challah Bread Substitutions & Variations
While sticking to the classic gluten-free challah recipe is tempting, experimenting with substitutions and variations can lead to delightful new flavors and textures.
I’ve had great success using almond flour in place of some of the rice flour, which adds a nutty richness.
If you’re looking for a dairy-free option, olive oil works wonderfully instead of melted butter.
For a touch of sweetness, I’ve swapped in honey or maple syrup for the sugar, creating a lovely glaze.
You might also try adding spices like cinnamon or cardamom for an aromatic twist.
Don’t forget to experiment with toppings—try poppy seeds or a sprinkle of sea salt for a savory contrast.
The possibilities are endless, so have fun with it!
What to Serve with Gluten Free Challah Bread
When it comes to enjoying gluten free challah bread, the right accompaniments can elevate the experience considerably.
I love serving it with a rich, homemade honey butter; the sweetness pairs beautifully with the bread’s texture. Cream cheese and jam also make a delightful spread, giving a burst of flavor that complements the challah.
For something savory, I recommend pairing it with a hearty vegetable soup or a warm bowl of chili; the bread is perfect for dipping!
If you’re feeling adventurous, try serving it alongside a fresh salad topped with nuts and fruit. Each of these options enhances the unique taste of gluten free challah, making every bite a true delight.
Additional Tips & Notes
To guarantee your gluten free challah bread turns out perfectly, it’s crucial to measure your ingredients accurately and keep an eye on the dough’s consistency.
If your dough feels too sticky, don’t hesitate to add a little more tapioca flour; just a tablespoon at a time. I also recommend using fresh yeast for the best rise.
If you’re making rolls, keep an eye on the baking time; they’ll bake faster than the loaf. For an extra touch, brush the tops with beaten egg before baking for a beautiful golden color.
Finally, let the challah cool completely before slicing; this helps maintain its structure. Enjoy experimenting, and you’ll find your perfect gluten free challah recipe!