Why You’ll Love this Gluten Free Sandwich Bread Recipe
When you crave a delicious sandwich, you’ll love this gluten-free sandwich bread recipe because it combines the rich flavors of coconut milk and oil with a texture that’s both soft and hearty.
I can’t get enough of how it holds up against my favorite fillings, making each bite satisfying. Plus, it’s easy to make; you don’t need any fancy equipment or skills.
Watching it rise is a joy, and the aroma that fills your kitchen while it bakes is simply irresistible.
Once it’s out of the oven, you’ll be tempted to slice into it right away. Trust me, whether you’re gluten-free or not, this bread will quickly become a staple in your home.
Enjoy it toasted or fresh!
Ingredients of Gluten Free Sandwich Bread
When it comes to making a delicious loaf of gluten-free sandwich bread, the right ingredients can make all the difference. This recipe is straightforward and calls for some pantry staples, as well as a few special items, like coconut milk and flax seed meal.
These ingredients not only add flavor but also help create that perfect texture we all crave in a good sandwich bread. So, let’s take a look at what you’ll need to whip up this scrumptious loaf.
Here’s a handy list of what you’ll need for this gluten-free sandwich bread:
- 1/4 cup flax seed meal
- 1/2 cup water (plus 1 tablespoon)
- 3 cups King Arthur gluten-free multi-purpose flour
- 3 tablespoons sugar
- 2 teaspoons instant yeast
- 1 1/4 teaspoons salt
- 1 1/4 teaspoons xanthan gum
- 1 cup warm coconut milk
- 1/4 cup coconut oil
Now, let’s chat a bit about these ingredients. First off, if you’ve never used flax seed meal before, don’t be scared; it’s a fantastic egg substitute and adds a nutty flavor along with healthy omega-3 fatty acids.
And the coconut milk? It’s rich and creamy, giving the bread a subtle sweetness that pairs so well with savory fillings. As for the gluten-free flour, King Arthur’s blend is great because it mimics the texture of traditional flour quite well.
Just remember, if you can’t find it, other gluten-free flours may work, but the results can vary. So, be cautious and maybe experiment a bit—who knows, you might stumble upon a new favorite!
How to Make Gluten Free Sandwich Bread
Making gluten-free sandwich bread at home isn’t only rewarding, but it’s also surprisingly easy. First things first, grab 1/4 cup of flax seed meal and mix it with 1/2 cup of water in a small bowl. Let it sit for about 10 minutes. This step is super important because it creates a gel-like mixture that acts as a binder, kind of like eggs do in traditional bread.
While that’s doing its thing, you can move on to the dry ingredients. In a large bowl, combine 3 cups of King Arthur gluten-free multi-purpose flour, 3 tablespoons of sugar, 2 teaspoons of instant yeast, 1 1/4 teaspoons of salt, and 1 1/4 teaspoons of xanthan gum. The xanthan gum is a magical ingredient that helps give the bread some structure since we’re skipping the gluten.
Once your dry ingredients are mixed, it’s time to bring in the wet ones. Drizzle in 1 cup of warm coconut milk while whisking away. Seriously, mix it well because you want it to come together smoothly. Next, add in 1/4 cup of melted coconut oil and mix until it’s thoroughly blended.
Now, here comes the fun part: beat in your flax mixture a third at a time, making sure to mix it well between each addition. You want to release your inner baker here; beat it at high speed for about 3 minutes until you’ve got a thick batter that’s smooth as silk.
After all that mixing, let your dough rise for an hour. This is the part where you can kick back and relax—maybe binge-watch that show you’ve been meaning to catch up on. Once it’s puffed up, gently deflate the batter by scraping down the sides of the bowl.
Grease an 8 1/2 by 4 1/2 loaf pan (trust me, you don’t want your masterpiece to stick) and scoop the dough in, pressing it level with a spatula or your wet fingers. Cover the pan with greased plastic wrap and let it rise again for about 45-60 minutes until it’s just above the rim of the pan.
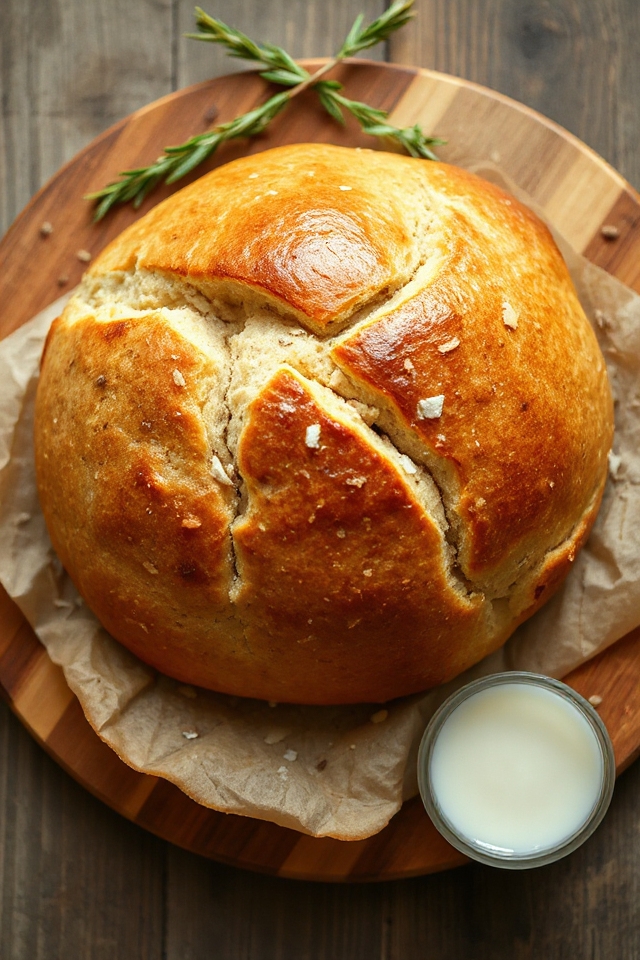
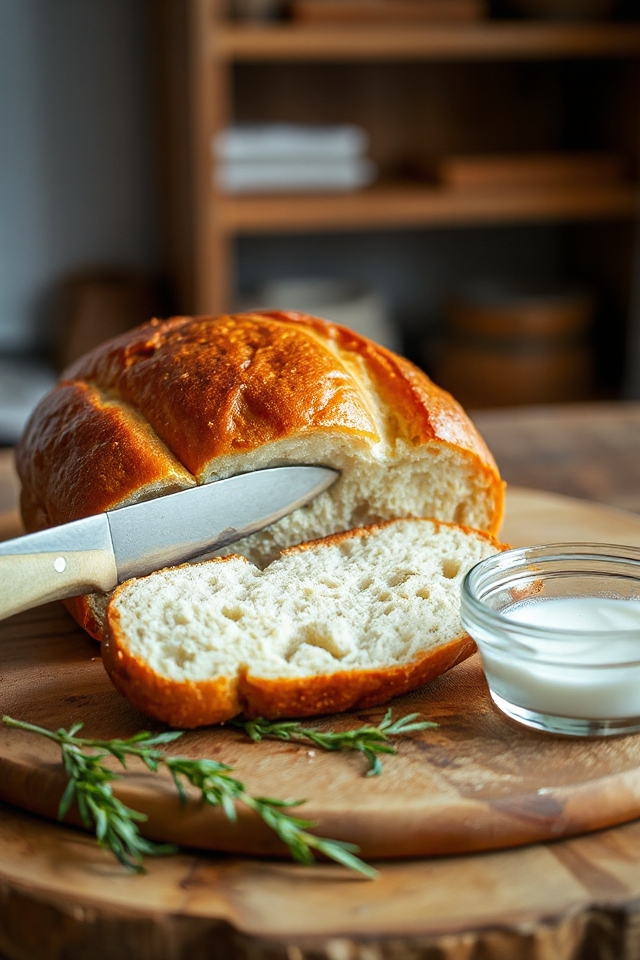
Then, preheat your oven to 350 degrees and bake your bread for 38 to 42 minutes until it’s golden brown. Once it’s out of the oven, let it cool on a rack before slicing into it. Enjoy the aroma, the texture, and the satisfaction of having made your very own gluten-free sandwich bread. It’s wholesome, it’s delicious, and it’s definitely worth the effort.
Gluten Free Sandwich Bread Substitutions & Variations
After you’ve mastered the basic gluten-free sandwich bread recipe, you might want to explore some substitutions and variations to suit your taste or dietary needs.
For a nut-free option, try using sunflower seed flour instead of almond flour; it works beautifully!
If you’re looking to enhance flavor, consider adding herbs like rosemary or thyme.
For a sweeter loaf, you can swap in honey or maple syrup for some of the sugar.
To boost nutrition, add seeds like chia or pumpkin seeds into the batter.
If you prefer a lighter texture, substitute half the coconut milk with almond milk.
Feel free to experiment; each variation opens up a world of delicious possibilities for your gluten-free bread!
What to Serve with Gluten Free Sandwich Bread
There’s something special about pairing gluten-free sandwich bread with delicious toppings and sides.
I love to layer on fresh avocado, a sprinkle of salt, and a squeeze of lime for a revitalizing twist. For a heartier option, I spread creamy hummus or a tangy pesto, then pile on roasted vegetables or grilled chicken.
If I’m in the mood for something sweet, a smear of almond butter with sliced bananas never disappoints. Pairing it with a simple side salad or a bowl of soup elevates the meal, too.
You can even serve it with your favorite gluten-free dips like salsa or guacamole for a fun snack. The possibilities are endless; I’m always excited to explore new combinations!
Additional Tips & Notes
When enjoying your gluten-free sandwich bread, some additional tips can enhance your baking experience and the final product.
First, make sure your ingredients are at room temperature; this helps with rising. I also recommend using a kitchen scale to measure flour for accuracy—too much can lead to a dense loaf.
If your dough feels too thick, don’t hesitate to add a little more warm coconut milk to achieve the right consistency.
After baking, let the bread cool completely before slicing to avoid a gummy texture.
For storage, wrap the cooled loaf in plastic wrap and keep it in the fridge to maintain freshness.
Finally, you can freeze individual slices for easy access later! Enjoy your baking journey!